0%

ROS2 动手实践Costmap新特性

废话不多说,我们直接开始。

搭建测试环境

为了避免花太多时间折腾环境问题。这里使用Docker来跑测试的示例。

安装Docker

1
2
3
4
5
6
7
8
9
10
11
12
13
14
15
16
# step 1: 安装必要的一些系统工具
sudo apt-get update
sudo apt-get -y install apt-transport-https ca-certificates curl software-properties-common

# step 2: 安装GPG证书
curl -fsSL http://mirrors.aliyun.com/docker-ce/linux/ubuntu/gpg | sudo apt-key add -

# Step 3: 写入软件源信息
sudo add-apt-repository "deb [arch=amd64] http://mirrors.aliyun.com/docker-ce/linux/ubuntu $(lsb_release -cs) stable"

# Step 4: 更新并安装 Docker-CE
sudo apt-get -y update
sudo apt-get -y install docker-ce

# Step 5: 查看docker是否安装成功
docker version

也可以使用小鱼提供的开源一键安装工具。关注小鱼的公众号《鱼香ROS》获取更多信息。

工具网址:
https://fishros.com/docs/page/#/tools/install-ros/%E4%B8%80%E8%A1%8C%E4%BB%A3%E7%A0%81%E5%AE%89%E8%A3%85%E5%AE%8C%E6%88%90ROS

1
wget http://fishros.com/install -O fishros && . fishros
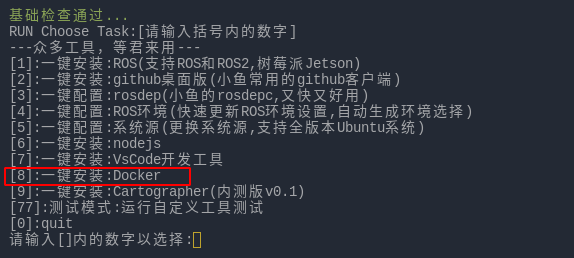
img

该命令需要在bash命令窗口运行,zsh命令窗口运行会出错。请知晓。

拉取Docker镜像

1
docker pull shoufei/ros2_galactic:latest_v_0_1

拉取示例代码

1
git clone https://gitee.com/shoufei/ros2_galactic.git

启动Docker环境

注意:下面命令中的/path_to/ros2_galactic需要改成你自己的路径

1
2
3
4
5
6
7
8
9
10
11
12
13
14
docker run -it \
-v /etc/localtime:/etc/localtime:ro \
-v /tmp/.X11-unix:/tmp/.X11-unix \
-v /path_to/ros2_galactic:/home/ubuntu/ros2_galactic \
-e DISPLAY=unix$DISPLAY \
-e GDK_SCALE \
-e GCK_DPI_SCALE \
-p 6080:80 \
--device /dev/snd \
--name ros2_desktop_galactic_latest \
--privileged \
--security-opt seccomp:unconfined \
--security-opt apparmor:unconfined \
shoufei/ros2_galactic:latest_v_0_1 /bin/bash

打开多个Docker环境的命令窗口

先查询docker的id。每台电脑上的id是随机生成的,请以自己的id为准。

1
docker ps -a

找到对应的CONTAINER ID

使用下面的命令登录Docker容器

1
docker exec -it 31ced27e1684 /bin/bash  #31ced27e1684是容器的id

切换容器中的用户名为ubuntu(这句要进入到容器中才执行)

1
su ubuntu

如果对Docker不是很了解,可以关注公众号《首飞》,回复”docker“。可以收到一本关于docker的电子书。希望能帮你入门。

启动测试命令

启动仿真环境

1
ros2 launch turtlebot3_gazebo turtlebot3_world.launch.py 

如果想测试KeepoutFilter就启动KeepoutFilter对应的命令,若想测试SpeedFilter就启动SpeedFilter对应的命令,不需要两个都启动。仿真环境和NAV2 Stack在更换测试内容时要重新启动。每个命令需要在不同的命令窗口中启动,所以要开启三个Docker环境的命令窗口。

测试KeepoutFilter

制作Keepout Mask

navigation2_tutorials/nav2_costmap_filters_demo/maps目录下,重新拷贝一份map.pgmmap.yaml并重命名文件。

需要注意的是,yaml文件中的image: map.pgm参数需要改成重新命名的名字。

可以通过下面的命令打开图片并且编辑。

1
gimp keepout_dark_mask.pgm

注:keepout_dark_mask为示例图片的名称,你需要改成自己的。

系统中没有安装gimp的话,按照下面的方法安装:

1
2
3
sudo apt update
sudo add-apt-repository ppa:otto-kesselgulasch/gimp
sudo apt install gimp

当然也可以使用其他自己比较熟悉的图片编辑器。

编辑操作方法查看下面的视频:

启动nav2_costmap_filters_demo节点

启动keepout相关NAV2 Stack

1
ros2 launch turtlebot3_navigation2 navigation2_keepout.launch.py use_sim_time:=True

运行下面的命令加载KeepoutFilter

下面有三个不同颜色深浅的keepout区域示例。可以分别启动试试效果。

注意:需要在工程包的src目录的上级目录运行下面的命令。

1
ros2 launch nav2_costmap_filters_demo costmap_filter_info.launch.py params_file:=src/navigation2_tutorials/nav2_costmap_filters_demo/params/keepout_params.yaml mask:=src/navigation2_tutorials/nav2_costmap_filters_demo/maps/keepout_mask.yaml
1
ros2 launch nav2_costmap_filters_demo costmap_filter_info.launch.py params_file:=src/navigation2_tutorials/nav2_costmap_filters_demo/params/keepout_params.yaml mask:=src/navigation2_tutorials/nav2_costmap_filters_demo/maps/keepout_light_mask.yaml
1
ros2 launch nav2_costmap_filters_demo costmap_filter_info.launch.py params_file:=src/navigation2_tutorials/nav2_costmap_filters_demo/params/keepout_params.yaml mask:=src/navigation2_tutorials/nav2_costmap_filters_demo/maps/keepout_dark_mask.yaml

如果你自行绘制了mask图片,则需将mask的地址更改一下。

这里有一个细节需要关注。

filters放在了plugins后面才被添加到combined_costmap_。这样的话,KeepoutFilter中人为标记的障碍物将不会被膨胀。

1
2
3
4
5
6
7
8
9
10
11
12
13
14
15
16
17
18
19
20
21
22
23
24
25
26
// Costmap Filters enabled
// 1. Update costmap by plugins
primary_costmap_.resetMap(x0, y0, xn, yn);
for (vector<std::shared_ptr<Layer>>::iterator plugin = plugins_.begin();
plugin != plugins_.end(); ++plugin)
{
(*plugin)->updateCosts(primary_costmap_, x0, y0, xn, yn);
}

// 2. Copy processed costmap window to a final costmap.
// primary_costmap_ remain to be untouched for further usage by plugins.
if (!combined_costmap_.copyWindow(primary_costmap_, x0, y0, xn, yn, x0, y0)) {
RCLCPP_ERROR(
rclcpp::get_logger("nav2_costmap_2d"),
"Can not copy costmap (%i,%i)..(%i,%i) window",
x0, y0, xn, yn);
throw std::runtime_error{"Can not copy costmap"};
}

// 3. Apply filters over the plugins in order to make filters' work
// not being considered by plugins on next updateMap() calls
for (vector<std::shared_ptr<Layer>>::iterator filter = filters_.begin();
filter != filters_.end(); ++filter)
{
(*filter)->updateCosts(combined_costmap_, x0, y0, xn, yn);
}

primary_costmap_主要用于合并所有plugins_的栅格值。然后combined_costmap_再合并primary_costmap_和所有filters。这样的处理是防止pluginsfilters之间互相干扰。

对于keepout_filter,通常需要在global_costmaplocal_costmap中都需要配置keepout_filter。这样的话,这两个层都能感知到虚拟墙。

keepout_filter的配置方式如下:

1
2
3
4
5
filters: ["keepout_filter"]
keepout_filter:
plugin: "nav2_costmap_2d::KeepoutFilter"
enabled: True
filter_info_topic: "/costmap_filter_info"

效果如下:

keepout_filter按照如下方式配置时,我们可以看到虚拟障碍物的膨胀效果:

1
2
3
4
5
plugins: ["obstacle_layer", "voxel_layer", "keepout_filter", "inflation_layer"]
keepout_filter:
plugin: "nav2_costmap_2d::KeepoutFilter"
enabled: True
filter_info_topic: "/costmap_filter_info"

注意:keepout_filter被放置在了plugins标签下,并且在inflation_layer之前。

测试SpeedFilter

制作Speed Mask

Speed Mask的制作方法和Keepout Mask是一样的。但是mask加载的模式会有区别。

Speed Mask的配置文件(navigation2_tutorials/nav2_costmap_filters_demo/maps/speed_mask.yaml)如下:

1
2
3
4
5
6
7
image: speed_mask.pgm
mode: scale
resolution: 0.050000
origin: [-10.000000, -10.000000, 0.000000]
negate: 0
occupied_thresh: 1.0
free_thresh: 0.0

其中mode设置为scalefree_thresh = 0.0occupied_thresh = 1.0表示以1:1的方式映射亮度值到速度限制百分比。

启动Speedlimit相关NAV2 Stack

1
ros2 launch turtlebot3_navigation2 navigation2_speedlimit.launch.py use_sim_time:=True

启动nav2_costmap_filters_demo节点

运行下面的命令加载SpeedFilter

1
ros2 launch nav2_costmap_filters_demo costmap_filter_info.launch.py params_file:=src/navigation2_tutorials/nav2_costmap_filters_demo/params/speed_params.yaml mask:=src/navigation2_tutorials/nav2_costmap_filters_demo/maps/speed_mask.yaml
1
ros2 launch nav2_costmap_filters_demo costmap_filter_info.launch.py params_file:=src/navigation2_tutorials/nav2_costmap_filters_demo/params/speed_params.yaml mask:=src/navigation2_tutorials/nav2_costmap_filters_demo/maps/speed_light_mask.yaml

这里同样有一个细节需要注意。

SpeedFilter只需要在global_costmap中进行配置,不需要在local_costmap中配置。因为这个filter主要的作用是根据机器人是否在设定的区域来限制机器人的速度。而设定的区域的栅格值并不会更新到combined_costmap_中。这一点查看该filter的处理函数就很清楚了。

1
2
3
4
5
6
7
8
9
10
11
12
13
14
15
16
17
18
19
20
21
22
23
24
25
26
27
28
29
30
31
32
33
34
35
36
37
38
39
40
41
42
43
44
45
46
47
48
49
50
51
52
53
54
55
56
57
58
59
60
61
62
63
64
65
66
67
68
69
70
71
72
73
74
75
76
77
78
79
80
81
82
83
84
85
86
87
88

void SpeedFilter::process(
nav2_costmap_2d::Costmap2D & /*master_grid*/,
int /*min_i*/, int /*min_j*/, int /*max_i*/, int /*max_j*/,
const geometry_msgs::msg::Pose2D & pose)
{
std::lock_guard<CostmapFilter::mutex_t> guard(*getMutex());

if (!filter_mask_) {
// Show warning message every 2 seconds to not litter an output
RCLCPP_WARN_THROTTLE(
logger_, *(clock_), 2000,
"SpeedFilter: Filter mask was not received");
return;
}

geometry_msgs::msg::Pose2D mask_pose; // robot coordinates in mask frame

// Transforming robot pose from current layer frame to mask frame
if (!transformPose(pose, mask_pose)) {
return;
}

// Converting mask_pose robot position to filter_mask_ indexes (mask_robot_i, mask_robot_j)
unsigned int mask_robot_i, mask_robot_j;
if (!worldToMask(mask_pose.x, mask_pose.y, mask_robot_i, mask_robot_j)) {
return;
}

// Getting filter_mask data from cell where the robot placed and
// calculating speed limit value
int8_t speed_mask_data = getMaskData(mask_robot_i, mask_robot_j);
if (speed_mask_data == SPEED_MASK_NO_LIMIT) {
// Corresponding filter mask cell is free.
// Setting no speed limit there.
speed_limit_ = NO_SPEED_LIMIT;
} else if (speed_mask_data == SPEED_MASK_UNKNOWN) {
// Corresponding filter mask cell is unknown.
// Do nothing.
RCLCPP_ERROR(
logger_,
"SpeedFilter: Found unknown cell in filter_mask[%i, %i], "
"which is invalid for this kind of filter",
mask_robot_i, mask_robot_j);
return;
} else {
// Normal case: speed_mask_data in range of [1..100]
speed_limit_ = speed_mask_data * multiplier_ + base_;
if (percentage_) {
if (speed_limit_ < 0.0 || speed_limit_ > 100.0) {
RCLCPP_WARN(
logger_,
"SpeedFilter: Speed limit in filter_mask[%i, %i] is %f%%, "
"out of bounds of [0, 100]. Setting it to no-limit value.",
mask_robot_i, mask_robot_j, speed_limit_);
speed_limit_ = NO_SPEED_LIMIT;
}
} else {
if (speed_limit_ < 0.0) {
RCLCPP_WARN(
logger_,
"SpeedFilter: Speed limit in filter_mask[%i, %i] is less than 0 m/s, "
"which can not be true. Setting it to no-limit value.",
mask_robot_i, mask_robot_j);
speed_limit_ = NO_SPEED_LIMIT;
}
}
}

if (speed_limit_ != speed_limit_prev_) {
if (speed_limit_ != NO_SPEED_LIMIT) {
RCLCPP_DEBUG(logger_, "SpeedFilter: Speed limit is set to %f", speed_limit_);
} else {
RCLCPP_DEBUG(logger_, "SpeedFilter: Speed limit is set to its default value");
}

// Forming and publishing new SpeedLimit message
std::unique_ptr<nav2_msgs::msg::SpeedLimit> msg =
std::make_unique<nav2_msgs::msg::SpeedLimit>();
msg->header.frame_id = global_frame_;
msg->header.stamp = clock_->now();
msg->percentage = percentage_;
msg->speed_limit = speed_limit_;
speed_limit_pub_->publish(std::move(msg));

speed_limit_prev_ = speed_limit_;
}
}

global_costmap中的配置如下:

1
2
3
4
5
6
filters: ["speed_filter"]
speed_filter:
plugin: "nav2_costmap_2d::SpeedFilter"
enabled: True
filter_info_topic: "/costmap_filter_info"
speed_limit_topic: "/speed_limit"

速度限制的方式有两种:

  • 限制为最大速度的多少百分比
  • 限制绝对最大速度

在这个实践示例中采用第一种以百分比限制速度的方式。该方式的配置在navigation2_tutorials/nav2_costmap_filters_demo/params/speed_params.yaml文件中。参数内容如下:

1
2
3
4
5
6
7
8
9
10
11
12
13
14
costmap_filter_info_server:
ros__parameters:
use_sim_time: true
type: 1
filter_info_topic: "/costmap_filter_info"
mask_topic: "/speed_filter_mask"
base: 100.0
multiplier: -1.0
filter_mask_server:
ros__parameters:
use_sim_time: true
frame_id: "map"
topic_name: "/speed_filter_mask"
yaml_filename: "speed_mask.yaml"

其中type为1表示采用百分比限制速度的方式。base设置为100,multiplier设置为-1.0是对应type来设置的。

速度限制的计算公式:

1
2
// Normal case: speed_mask_data in range of [1..100]
speed_limit_ = speed_mask_data * multiplier_ + base_;

speed_mask_dataOccupancyGrid中的栅格值,范围为0~100。根据上面的计算公式,将产生这样的效果:颜色越深,栅格值speed_mask_data越大,最后得到的speed_limit_(速度限制百分比)越小。

如果我们只想让速度限制百分比在一个区间中变动,比如[40.0%..50.0%]。可以这样base = 40.0, multiplier = 0.1设置。速度限制百分比将以0.1%的步长在[40.0%..50.0%]区间内变动。

speed_limit_为0的时候表示没有速度限制,所以当画的mask区域颜色非常深,是障碍物的深度,可能计算出来的速度限制百分比为0。

速度限制效果如下:

实践参考

Navigating with Keepout Zones

Navigating with Speed Limits

更多关于costmapkeepout_filterspeed_filter的详细内容请查看之前发布文章:

Navigation:costmap是什么?

[ROS2] 你应该知道Costmap_2d 的这些细节